Are you interested in mushroom cultivation but don’t have a pressure cooker? Don’t worry! Sterilizing your substrate is a crucial step in ensuring successful mushroom growth. In this article, we will explore alternative methods to sterilize your substrate without a pressure cooker. Let’s dive in!
Composting: A Natural Approach to Sterilization
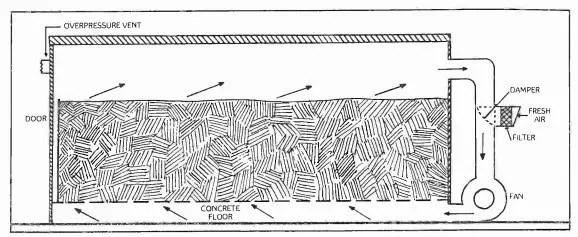
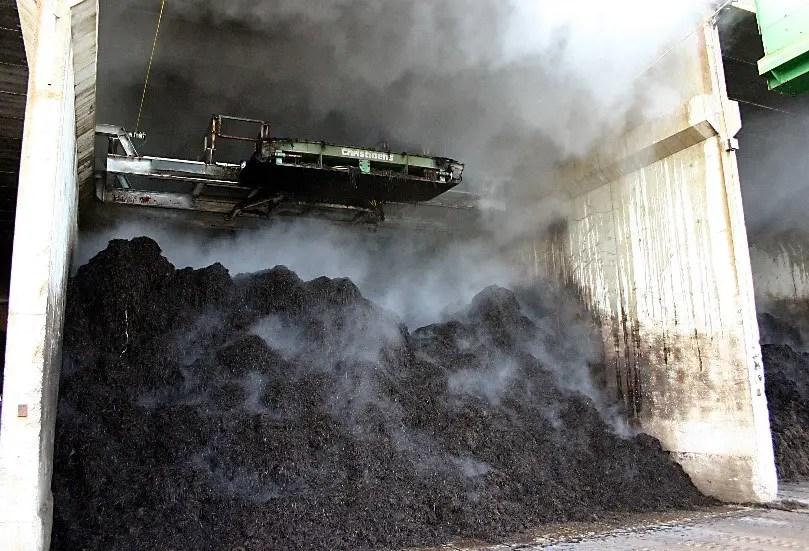
Composting is not only used for growing button mushrooms but has also found its way into cultivating oyster mushrooms. This two-step process involves biological and chemical decomposition of the raw materials, which heats up the substrate to around 80°C. Composting provides effective sterilization, resulting in high yields.
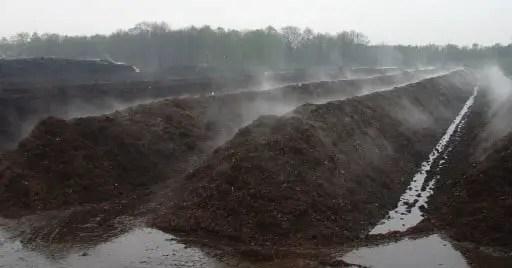
How to Compost Your Substrate
- Substrate Preparation: Pile up your substrate to create a heap.
- Moisturizing: Thoroughly water your substrate, aiming for a moisture content of around 75%.
- Composting: Over the next 7 days, regularly water and mix your substrate to prevent hot spots from forming. The composting process naturally heats up the pile to 60-70°C.
- Filling the Tunnels: After 7 days, transfer the substrate to a tunnel.
- Pasteurization: Close the tunnel and maintain a temperature of 65°C for 18 hours, using aerated steam.
- Conditioning: Reduce the heat to approximately 48°C and maintain it for 48 hours.
- Cooldown: Stop the heating process and let the substrate cool down to 25°C.
- Inoculation: Inoculate the substrate with a spawn rate of about 5%.
- Bagging: Fill your bags with the inoculated substrate and place them in your grow chamber.
Chemical Sterilization: An Inexpensive Option
Chemical sterilization is another method commonly used in scientific studies. However, it is important to note that the risks associated with using chemicals make it an undesirable option. Various chemicals have been employed for substrate sterilization, but their toxic and hazardous nature outweighs their benefits.
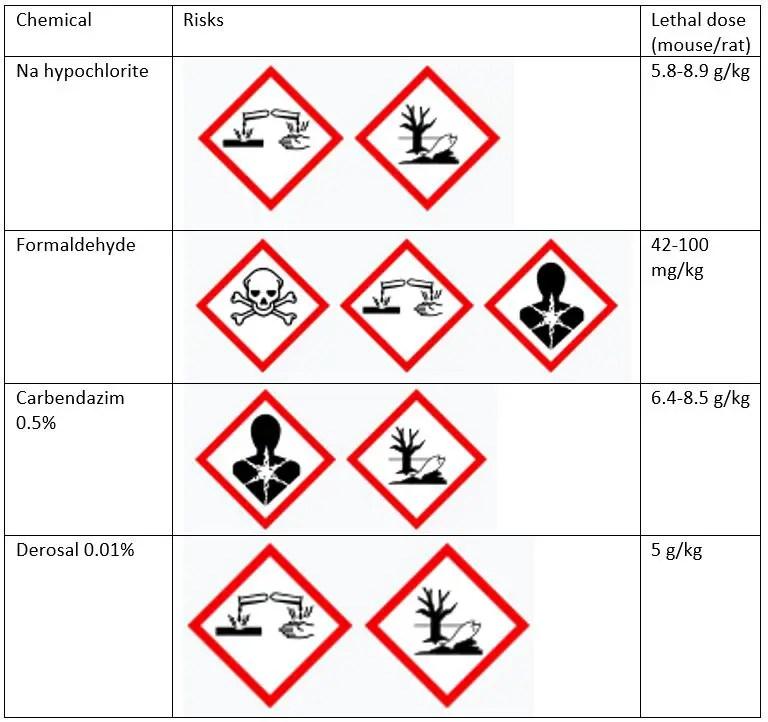
Cold Water Lime Pasteurization: A Safer Alternative
Cold water lime pasteurization offers a relatively safe method for sterilizing substrate. Although it is corrosive and potentially harmful, it has low toxicity and is commonly used in the food industry. However, it is crucial to ensure that the lime used has a low magnesium content (<2%) and is high in calcium. Excessive magnesium can inhibit mycelium growth.
To use cold water lime pasteurization:
- Substrate Preparation: Chop your substrate (usually straw) into 1-6 cm long pieces.
- Prepare the Water: Add approximately 7 grams of hydrated lime for every 4 liters of water.
- Add Your Substrate and Soak: Thoroughly mix your substrate after adding it to the water. Soak for 12-24 hours.
- Drain: Place the substrate on a metal rack and allow it to drain for a maximum of 2 hours.
- Inoculate: Inoculate the dried substrate with roughly 17% or 1 pound of spawn per 6-pound bag.
- Bagging: Fill your bags with the inoculated substrate and place them in your grow chamber.
Hot Water Immersion (Scalding): Simple and Effective
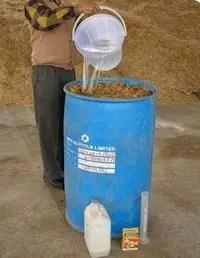
Scalding involves immersing the substrate in hot water for 1 to 1.5 hours. This method offers a straightforward way to achieve sterilization.
How to Scald Your Substrate
- Substrate Preparation: Chop your substrate (typically straw) into 1-6 cm long pieces.
- Prepare the Water: Heat the water to around 80°C.
- Add Your Substrate: Mix your substrate thoroughly after adding it to the hot water.
- Drain: Place the substrate on a metal rack and let it drain for a maximum of 2 hours.
- Inoculate: Inoculate the dried substrate with 5% on a wet weight basis.
- Bagging: Fill your bags with the inoculated substrate and place them in your grow chamber.
Pasteurization: An Established Method
Pasteurization is a widely used method for sterilizing mushroom substrate. By subjecting the substrate to temperatures between 60-80°C, harmful contaminants are eliminated. Super-pasteurization, involving higher temperatures of 80-100°C, further enhances the sterilization process.
How to Pasteurize Your Substrate
- Substrate Preparation: Chop your substrate (usually straw) into 1-6 cm long pieces.
- Bagging: Fill your bags with the chopped substrate.
- Prepare the Water: Heat the water to approximately 100°C. Higher temperatures reduce processing time.
- Fill the Barrel: Place your bags in a barrel with a pressure relief valve set at 0 Psi.
- Introduce Steam: Introduce hot steam from your water tank into the barrel, starting from the bottom.
- Let it Process: Allow the process to run for 12-15 hours. Ensure an adequate water supply during this time.
- Drain: Remove the bags and let them cool down for at least 24 hours, ensuring the temperature inside the bags is below 28°C.
- Inoculate: Inoculate the dried substrate with 5% on a dry weight basis.
- Bagging: Fill your bags with the inoculated substrate and place them in your grow chamber.
Tyndallization: An Alternative Sterilization Method
Tyndallization, a sterilization method developed by John Tyndall, involves treating the substrate in cycles. During these cycles, the substrate is subjected to alternating periods of exposure to high temperatures and resting at room temperature. The repeated process eliminates bacteria, making Tyndallization an effective sterilization method.
Important Note
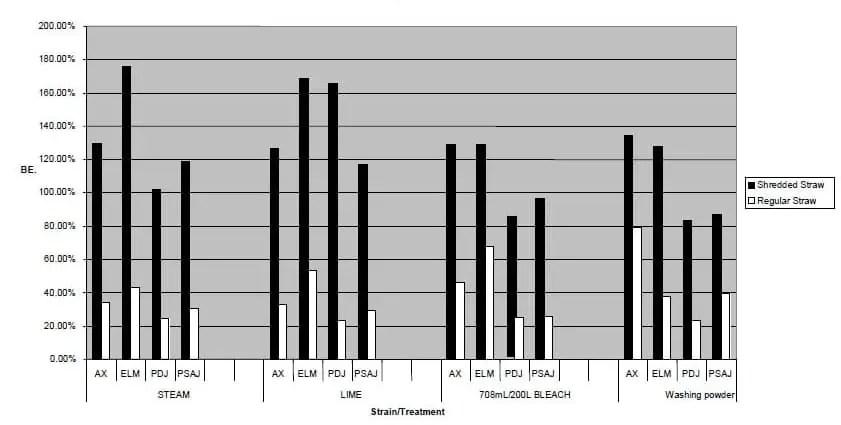
These alternative sterilization methods provide promising results, even without a pressure cooker. However, it is essential to remember that the results may vary depending on factors such as substrate composition and other variables. Use these methods as benchmarks and compare your results accordingly.
Now it’s your turn! Which sterilization method are you most excited to try? Let me know in the comments below! And if you have any questions or need further assistance, feel free to reach out. Happy mushroom cultivation!
This article is brought to you by Ekilove.com.


